


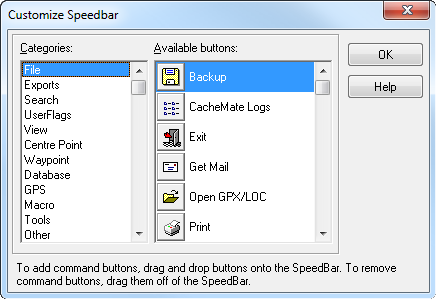
This option will allow you to customize the tool bar to suit your needs. You may add, remove, and change position of any of the buttons. Buttons are available for almost all menu options, plus there are buttons for custom URLs and Macros.
1. Dragging from the list of buttons to the tool bar.
Firstly, if the button already exists on the tool bar you will not be able to drag the button from the customize dialog. The cursor will change to "no go" (circle with a bar through it). However, you can move/remove the corresponding button on the tool bar.
If the button does not exist on the tool bar, the cursor will change to a "hand" and you can drag the button to anywhere on the tool bar. Note: when dropping the button (release your left mouse button) the tool button will only "snap" onto the tool bar when you have aligned the top of the button with any part of the tool bar. If the top of the button is not placed anywhere in the tool bar when you drop the button, it will not "snap" on to the tool bar, and you will have to repeat the process again.
2. Moving/Deleting buttons from the tool bar
When you drag a tool button that is already there (move your mouse holding down the left mouse button) the cursor will change to a "hand". When you can see both the "hand" cursor and the tool button, dropping the button will then "snap" the button back on the bar. As soon as you can see the "hand" but not the button, then dropping the button will remove it from the tool bar. Note: the button will disappear from view as soon as you drag the top part of the button anywhere outside the tool bar. As long as you can at least see the hand, then if you drag the top of the (now invisible) button anywhere back inside the tool bar you will again be able to see the button.
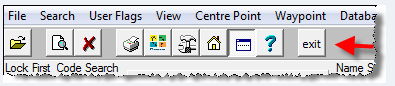
Note: GSAK also supports custom icons for all tool buttons. To implement place your required icons in your "ToolBar" folder (located in you [application data]\UserImages folder (see "Tools=>Folder finder" to locate [application data]) and place your required icons in there (they *must* be .bmp files - recommended size is 28x28 pixels ). The name of the file must be equal (though not case sensitive) to the button description. For example, to change the icon for the "Exit" button, simply place a file called "Exit.bmp" in the "ToolBar" folder. Some menu options contain the illegal file name character "/" in the description (For example, "File=>Open GPX/LOC"). For these icons simply remove the "/" from the file name and GSAK will look for that file. In other words, to replace this icon the file name would be called "Open GPXLOC.bmp". Some users have trouble associating icons with buttons and may prefer just plain text instead of the existing icons. GSAK also supports "text only" overrides for all the buttons. This works in a similar manner to the .bmp files but we use .txt files. Taking our example of the exit button, you just create a file called "Exit.txt"and the button uses the text in this file rather than the default icon. So if we created a file (any plain text editor like notepad would do the job) called "Exit.txt" with the contents of "exit" and placed it in the "ToolBar" folder we then see:
Also note that the name of the file can be the English description or the translated description. However, English description file name will work regardless of your language setting. GSAK hosts a forum where you can download and exchange icons - see this link.