
You can create a form from scratch, or update an existing form. To update an existing form, right mouse click and select "Get from file"
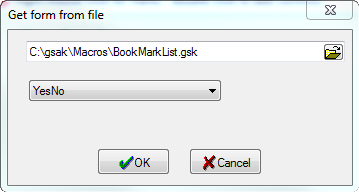
Enter the location of the GSAK macro that contains your form and then the drop down box should automatically be populated with all the forms in this macro. Select the form you want to update, then click on OK
Alternatively you just copy your form code (everything from <data> to <enddata> to the clipboard, then in the GSAK form editor right mouse click and select "Get form from clipboard".
Double mouse click to add a control at the position of your mouse. Of course you can always move the control if you don't like where it is placed. Just drag the control to the new position. You can also make very small adjustments to the movement of a control via the keyboard. First select the control, then:
Ctrl + Arrows moves objects one pixel
Shift + Arrows re sizes by one pixel
Ctrl + Shift + Arrows moves objects one grid spacing
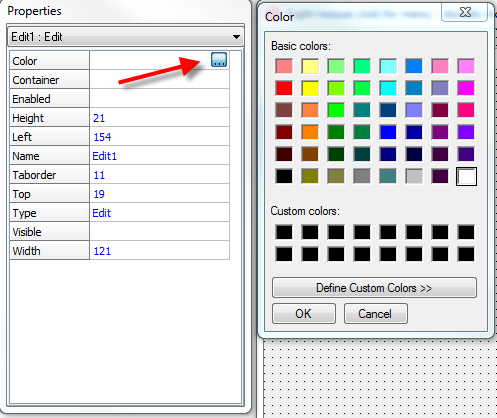
The properties dialog to the left, allows you to update any properties associated with the form. If you click on a property and it is displays a ... button, this button will assist you to enter that property.To "accept" the value depends on property type you are editing. If it is from the keyboard, you must press ENTER or click in another cell. Anything else will depend on the dialog/drop down that is presented when you generate the value, but it should be quite obvious from that dialog/drop down what the "accept" action is as opposed to what the reject/cancel action is. Another way of looking at this is that the value is not saved/committed until you consciously "accept" it.
For example select the "Color" attribute, then click on the ... button. You are presented with a dialog that enables you to visually see the colors and select the one you want. When you click on OK, the color number will be inserted in that property for you.
If you originally selected the form via the "Get from file" option, you can simply update the form in your macro by right mouse click and select "Exit and update file"
If your original form is from the clipboard, then to get the updated form back in your macro, just right mouse click and select the option "Exit and copy code to clipboard". The form is converted to GSAK macro statements that you can now just paste into your macro code.
You can drag controls around the form with your mouse to your desired position
To resize a control just drag the control "handles"
You can also move/delete/resize/align more than one control by selecting multiple controls. There are two ways to select multiple controls:
1. Hold down the shift key while you click on the controls
2. Draw a rectangle with your mouse around the controls you want to select
You can "Undo" (Ctrl-Z) any changes you have made to the form. The "Undo" feature keeps a history of each change you make and you can undo them one by one (starting at your most recent change)
Menu options:
Get from file - Select a form to update from a macro file.
Get from clipboard - The form is "pasted" from the clipboard (you would need to have previously copied the form statements to the clipboard)
Add - Alternative method for adding controls (double mouse click is recommended)
Edit - Access to the Cut, Copy, Paste, and Undo functions
Delete - Delete a control
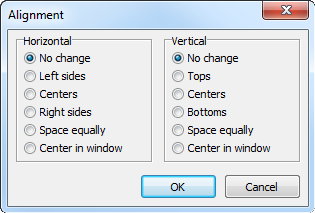
Align... - Use this option to align a single or any group of selected controls.
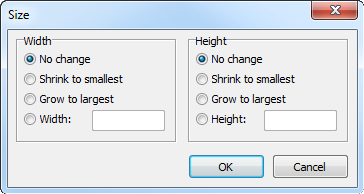
ReSize... - Use this option to resize a single or any group of controls
Send to Back - Use this option when you have a group of overlapping controls on the form. It allows you move this control behind all others.
Bring to Front - Use this option when you have a group of overlapping controls on the form. It allows you move this control in front of all others.
Tab order - Set the tab order of controls (supports drag and drop)
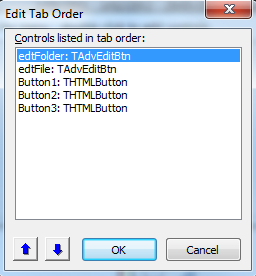
Properties - Display the properties for this control in the properties dialog (same as a single click on a control)
Settings - Access to the forms designer settings:
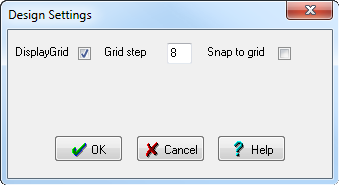
Display Grid - Toggles the display of the grid (dots) on the form
Grid Step - Number of pixels between each dot on the grid
Snap to Grid - When you add or move a control, it will always be aligned with points on the grid.
Help - Display this help page
Copy to clipboard - Generate the form code and copy it to the clipboard. The forms designer remains active
Exit and copy to clipboard - Generate the form code, copy to the clipboard, and then exit the forms designer (You can then paste the contents into your macro)
Exit and update file - Only available if you originally selected "Get from file" to update this form. This option will then update the form directly in your Macro file.
For more information on using forms in a macro, see this topic.


