A button that can be clicked on (doing so causes the form to exit). When the form exists, you have two ways to determine which button was "clicked" to cause the exit.
1. Test the Boolean variable with the same name as the button. When you create a button on a form, a GSAK variable with the same name is generated. This variable is set to True when the button is Clicked and False if another button is clicked
2. Test the result value of the Form() function. When you display a form using the Form() function, the name of the control that caused the form to exit is returned as the result.
Supported properties
Alignment - This specifies the alignment of the caption. Possible values are Left, Center,Right and HTML. HTML is similar to left and would normally be used when you have HTML in your caption ( use HTML "align" to control alignment)
Caption - The button text. The button text also supports a limited subset of HTML to help change the look of the button (color, icons, etc). For more information see this link
Container - The control that the button control "belongs" to. Every control has a container, and each control defaults to having the form as its container. Only a named Groupbox can be specified for the Container property (or blank to default to the form). When using the properties Top and Left, they are always relative to the control's container. Groupbox containers can be used to group like controls together. Note: You must always define the container before any controls that use this container.
Enabled - Yes, No. The enabled property set to "No" will automatically show the control in the "gray ghost" outline and prevent the user moving focus to it.
Enter - Yes, No. If yes, then when you press "Enter" on the keyboard, this button is activated. (also see button note below)
Escape - Yes, No. If yes, then when you press "Escape" on the keyboard, this button is activated (also see button note below).
Height - Vertical height in pixels
Left - Position from the Left, which is the number of pixels relative to the container
Name - The button control name
TabOrder - The Taborder property applies to all controls than can receive input focus and regulates the order the controls will jump to when using tab on the keyboard. This means it doesn't matter what order the controls are defined in your code - the taborder property will decide your tabbing order. Taborder is a "smart" property. For example, if you set the value of a control to say 7, then any existing control that has a tab order of 7 will automatically be changed to 8, and all higher tab numbers will be incremented by one.
Also note that the tab order is relative to the container, so controls inside a group box have their own tabbing order starting at zero. The group box itself has a tabbing order within its container as well (usually the form) Don't be alarmed if you update your form and see taborder values starting at 8. The macro form has a few "hidden" controls that take up tab slots. You can actually use any number you like for the Taborder (even zero). You just need to remember that tabbing order is respected in an ascending numerical sequence
Top - Position from the top, which is the number of pixels relative to the container
Spellcheck - You can only specify the name of a memo or edit control here. When there is a named control set, clicking the button will no longer exit the form and return control to the macro. The sole purpose of the button will now be to spell check the corresponding control.
Type - The control type, which must always be "Button"
Visible - Yes, No. If set to "No" then the button will not be visible on the form
Width - Horizontal length in pixels
Note: Buttons also support another common Windows/Form convention. When allocating the "Caption" property of a button if you precede any letter of the caption with &, that letter then becomes the Alt- hot key for that button. You will also notice the caption of the button shows this character with and underline so you can see this is the Alt- combination required to activate it. This hot key can then be used at any time from any control to action that button.
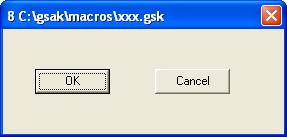
Example: Show which button was "clicked"
While True # Infinite loop to redisplay form as required $FormExit = form($form,"") BeginCase Case $FormExit = "DelayExit" MsgOk msg="Form exit via Delay" break Case $FormExit = "SystemExit" MsgOk msg="Form exit via red X button on form" break Case $FormExit = "btnCancel" MsgOk msg="Form exit from the cancel button" break Case $FormExit = "btnOk" msgOk msg="We clicked on the OK button, form will redisplay" # perform OK calcs here, then because we do not have a BREAK the form will redisplay EndCase EndWhile <Data> VarName=$form #******************************************************************** # Form generated by GSAK form designer on Sat 01-Sep-2007 16:26:20 #******************************************************************** Name = Form1 Type = Form Delay = 10 Height = 137 Width = 287 Name = btnOk Type = Button Height = 25 Left = 32 Top = 40 Width = 75 Caption = OK Name = btnCancel Type = Button Height = 25 Left = 152 Top = 40 Width = 75 Caption = Cancel <enddata> |