


Also note that you will see an offline view of the selected cache. This screen shows in a separate non modal dialog. You can re size (including maximize to full screen) and move to suit. Users with dual monitors or large screens should get the most out of this feature. However, even on a small nettop it should be usable. That is, you can position the HTML display so that just some part is shown behind the edit dialog. Now you can easily toggle between the edit dialog and the HTML screen simply via a mouse click to the corresponding dialog.
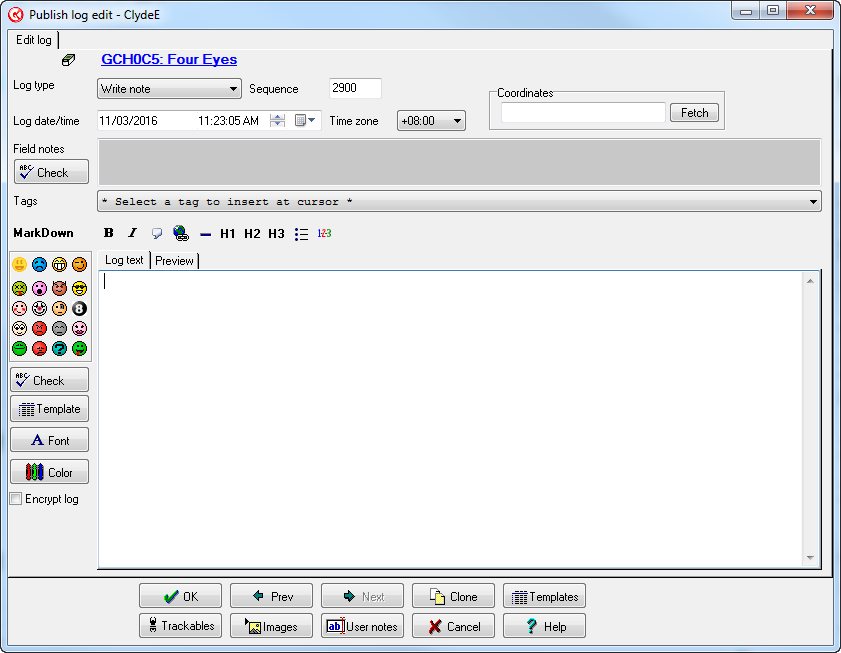
Log type - Select the required log type from the drop down list.
Sequence - When logs are published to Geocaching.com, they are sent in sequence order. Change the sequence number to reflect the order you want the log published.
Add favorite point - If you are logging a find you can check this box to allocate a favorite point to this cache log.
Log date and time - This is the date and time of the log. It should usually be given in local time, but also make sure you enter the correct time zone
Zone - This is the time zone associated with the Log date and time. Note: All log date/times must be *posted* a GMT/Zulu times. However, when doing the initial fetch GSAK will determine your time zone and substitute today's date. You should always post your log date/times according to the corresponding time zone (change if required) GSAK will convert the date/time to GMT when posting the log.
First to find - Check this box to have GSAK update the cache in the database as a FTF (if the cache exists in the database). Also see "FTF text" in the publish logs dialog.
Coordinates - If you have any coordinates to post with your log, enter them here. Click on the "Fetch" button to grab the coordinates from the current cache.
Field notes - If this entry was the result of populating your grid from a "Geocaching friendly GPSr" or supported file, then you will see the field notes here
Tags - You can select from the drop down list tags which will have the corresponding values converted when the log is published. For a more compete definition of tags see Templates
MarkDown - Groundspeak do not support HTML in logs, but they do support MarkDown which enables you to enhance the look of your logs. Use this bar to quickly insert the required MarkDown code. For more information on entering MarkDown see this link. If you select some text then that text will be wrapped in the corresponding MarkDown symbols, otherwise these symbols will just be inserted at the cursor and it is up to you to insert the text.The one exception is the "link" button - you will be prompted with a dialog. You can then click on the preview tab to view the result.
Encrypt log - Check this box to have GSAK publish the log as encrypted (similar to how "hints" are encrypted)
 Click on any one of the icons to have the corresponding smiley inserted at the cursor. Smiley codes are converted to the corresponding icon when viewed at Geocaching.com or in the HTML displays of GSAK. Click on the preview tab to see the final result of your log with these codes converted.